2-p0021-0039-cjp_en 13 / 20
10秒後にBOOKのページに移動します
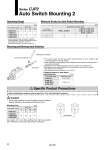
Operating Range Minimum Stroke for Auto Switch Mounting . Since the operating range is provided as a guideline including hysteresis, it cannot be guaranteed (assuming approximately ±30% dispersion). It may vary substantially depending on an ambient environment. 1 2 D-M9尰, D-M9尰V 5 5 D-M9尰W, D-M9尰WV D-M9尰A, D-M9尰A(V) D-A9尰, D-A9尰V 5 10 Mounting and Moving Auto Switches Watchmaker’s screwdriver Auto switch Auto switch mounting screw q Fit an auto switch into the auto switch mounting groove to set it roughly to the mounting position for an auto switch. w After reconfirming the detecting position, tighten the auto switch mounting screw. to secure the auto switch. e Modification of the detecting position should be made in the condition of q. . When tightening an auto switch mounting screw, use a watchmaker’s screwdriver with a handle of approximately 5 to 6 mm in diameter. (Use a tightening torque of approximately 0.10 to 0.20 N・m.) Tightening torque for auto switch mounting screw 4 . 2.5 6 5 2.5 10 6 3 16 7 3.5 Auto switch model Tightening torque 0.10 to 0.20 0.05 to 0.15 D-A9尰(V) D-M9尰(V) D-M9尰W(V) D-M9尰A(V) (N・m) (mm) (mm) Auto switch model Bore size D-A9尰(V) D-M9尰(V) D-M9尰W(V) D-M9尰A(V) No. of auto switches mounted Applicable auto switch model 1. If auto switch cylinders are used in parallel, keep the distance between cylinders in accordance with the below chart. Caution Use caution not to use them, getting closer than the specified pitch. Otherwise, it may cause auto switch to malfunction. Before handling auto switches, refer to pages 8 to 12 for Auto Switches Precautions. Mounting pitch Auto switch model Bore size 4 D-A9尰(V) . D-M9尰(V) D-M9尰W(V) D-M9尰A(V) 6 20 25 30 25 25 30 35 10 16 Mounting Pitch (mm) Specific Product Precautions Series CJP2 Auto Switch Mounting 2 32