1-p0011-0120-sj2000_en 108 / 111
10秒後にBOOKのページに移動します
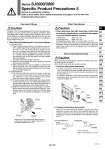
3/5(E) port 1(P) port 4(A) port 2(B) port Hold down part of the release button with your finger or a similar tool, as shown in the diagram, and pull out in the direction indicated by the arrow. When attaching and detaching a connector, first shut off the electric power and the air supply. Also, crimp the lead wires and sockets securely. 1. Connector attachment/detachment . To attach a connector, hold the lever and connector unit between your fingers and insert straight onto the pins of the solenoid valve so that the lever’ s pawl is pushed into the groove and locks. . To detach a connector, remove the pawl from the groove by pushing the lever downward with your thumb, and pull the connector straight out. 2. Crimping of lead wires and sockets Peel 3.2 to 3.7 mm of the tip of lead wire, enter the core wires neatly into a socket and crimp it with a special crimp tool. Be careful so that the cover of lead wire does not enter into the crimping part. (Please contact SMC for the dedicated crimping tools.) Caution How to Use Plug Connector 0.2 to 0.33 mm2 Max. cover diameter: o1.7 mm Core wire Core wire crimping area Crimping area Insulation Hook Lead wire Socket (Part no.:DXT170-71-1) Lead wire Socket Hook Pin Concave Connector Lever Cover Caution One-touch Fittings 1. When using other than SMC brand tube, confirm that the following specifications are satisfied with respect to the tube outside diameter tolerance. 1) Nylon tube within ± 0.1 mm 2) Soft nylon tube within ± 0.1 mm 3) Polyurethane tube within +0.15 mm, within .0.2 mm Do not use tube which does not meet these outside diameter tolerances. It may not be possible to connect them, or they may cause other trouble, such as air leakage or the tube pulling out after connection. Caution Other Tube Brands The pitch of the SJ series piping ports (A, B etc.) has been set assuming the use of KJ series One-touch fittings. Therefore, when using fittings with an M3 or M5 port block assembly, there may be some interference between fittings, depending on the type and size, so please use after checking dimensions in the catalog for the pipe fitting being used. 1. Tube attachment/detachment for One-touch fittings 1) Tube attachment (1) Take a tube having no flaws on its periphery and cut it off at a right angle. When cutting the tube, use tube cutters TK-1, 2 or 3. Do not use pinchers, nippers or scissors, etc. If cutting is done with tools other than tube cutters, the tube may be cut diagonally or become flattened, etc., making a secure installation impossible, and causing problems such as the tube pulling out after installation or air leakage. Also allow some extra length in the tube. (2) Grasp the tube and push it in slowly, inserting it securely all the way into the fitting. (3) After inserting the tube, pull on it lightly to confirm that it will not come out. If it is not installed securely all the way into the fitting, this can cause problems such as air leakage or the tube pulling out. 2) Tube detachment (1) The 4(A) and 2(B) ports use the KJ series, so the tube can be removed by pressing on part of the release button. However, for the 1(P) and 3/5(E) ports, please press the release button evenly as before. (2) Pull out the tube while holding down the release button so that it does not come out. If the release button is not pressed down sufficiently, there will be increased bite on the tube and it will become more difficult to pull it out. (3) When the removed tube is to be used again, cut off the portion which has been chewed before reusing it. If the chewed portion of the tube is used as is, this can cause trouble such as air leakage or difficulty in removing the tube. 117 Series SJ2000/3000 Specific Product Precautions 5 Be sure to read before handling. Refer to front matter 53 for Safety Instructions and pages 3 to 8 for 3/4/5 Port Solenoid Valve Precautions. SY SJ SY SV SYJ SZ VF VP4 S0700 VQ VQ4 VQ5 VQC VQC4 VQZ SQ VFS VFR VQ7 A