7-p0357-0370-vch41_en 14 / 15
10秒後にBOOKのページに移動します
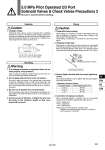
R Valve OFF Switching element C Leakage current 5.0 MPa Pilot Operated 2/3 Port Solenoid Valves & Check Valves Precautions 2 Be sure to read this before handling. 1. If air leakage increases or equipment does not operate properly, stop operation. After mounting is completed, confirm that it has been done correctly by performing a suitable function test. 2. Do not apply external force to the coil section. Be sure to apply the wrench to the external part of the piping connection. (Hexagonal parts or width across flats) Also, use caution when mounting a silencer or piping to the VCH410 series 3 port solenoid valve because the top (G1/4) is a pilot exhaust port. 3. Be sure not to position the coil downwards. When mounting a valve with its coil positioned downwards, foreign objects in the fluid will adhere to the iron core leading to a malfunction. 4. Avoid sources of vibration, or adjust the arm from the body to the minimum length so that resonance will not occur. Warning Caution Caution 1. Leakage voltage Particularly when using a resistor in parallel with a switching element and using a C-R element (surge voltage suppressor) to protect the switching element, take note that leakage current will flow through the resistor, C-R element, etc., creating a possible danger that the valve may not turn off. Selection Mounting Piping 1. Preparation before piping Before piping is connected, it should be thoroughly blown out with air (flushing) or washed to remove chips, cutting oil and other debris from inside the pipe. Avoid pulling, compressing, or bending the valve body when piping. 2. Wrapping of pipe tape Pipe tape is not necessary since this product uses a pneumatic and hydraulic purpose G thread which conforms to ISO 1179-1. When an R (taper) thread is used, leave 1 to 2 threads at the tip exposed before winding the piping thread around it 4 to 5 times. 3. Always tighten threads with the proper tightening torque. When attaching fittings to valves, tighten with the proper tightening torque shown below. Connection threads G, Rc 1/2 G, Rc 3/4 G, Rc 1 28 to 30 28 to 30 36 to 38 Proper tightening torque N・m Tightening Torque for Piping 4. Connection of piping to products When connecting piping to a product, refer to its instruction manual to avoid mistakes regarding the supply port, etc. . Port 1: Supply port . Port 2: Output port . Port 3: Exhaust port Note) Supply port when used as a selector valve. However, use within the range of the port 1 pressure port 3 pressure x 2 (2 times). >= Winding direction Pipe tape (Winding the pipe tape 4 to 5 times) Expose approx. 2 threads AC coil: 10% or less of rated voltage DC coil: 2% or less of rated voltage Power supply Connecting a R thread Leakage voltage 369 VCH VDW VQ LVM